Why Cosplay? Why a Dalek?
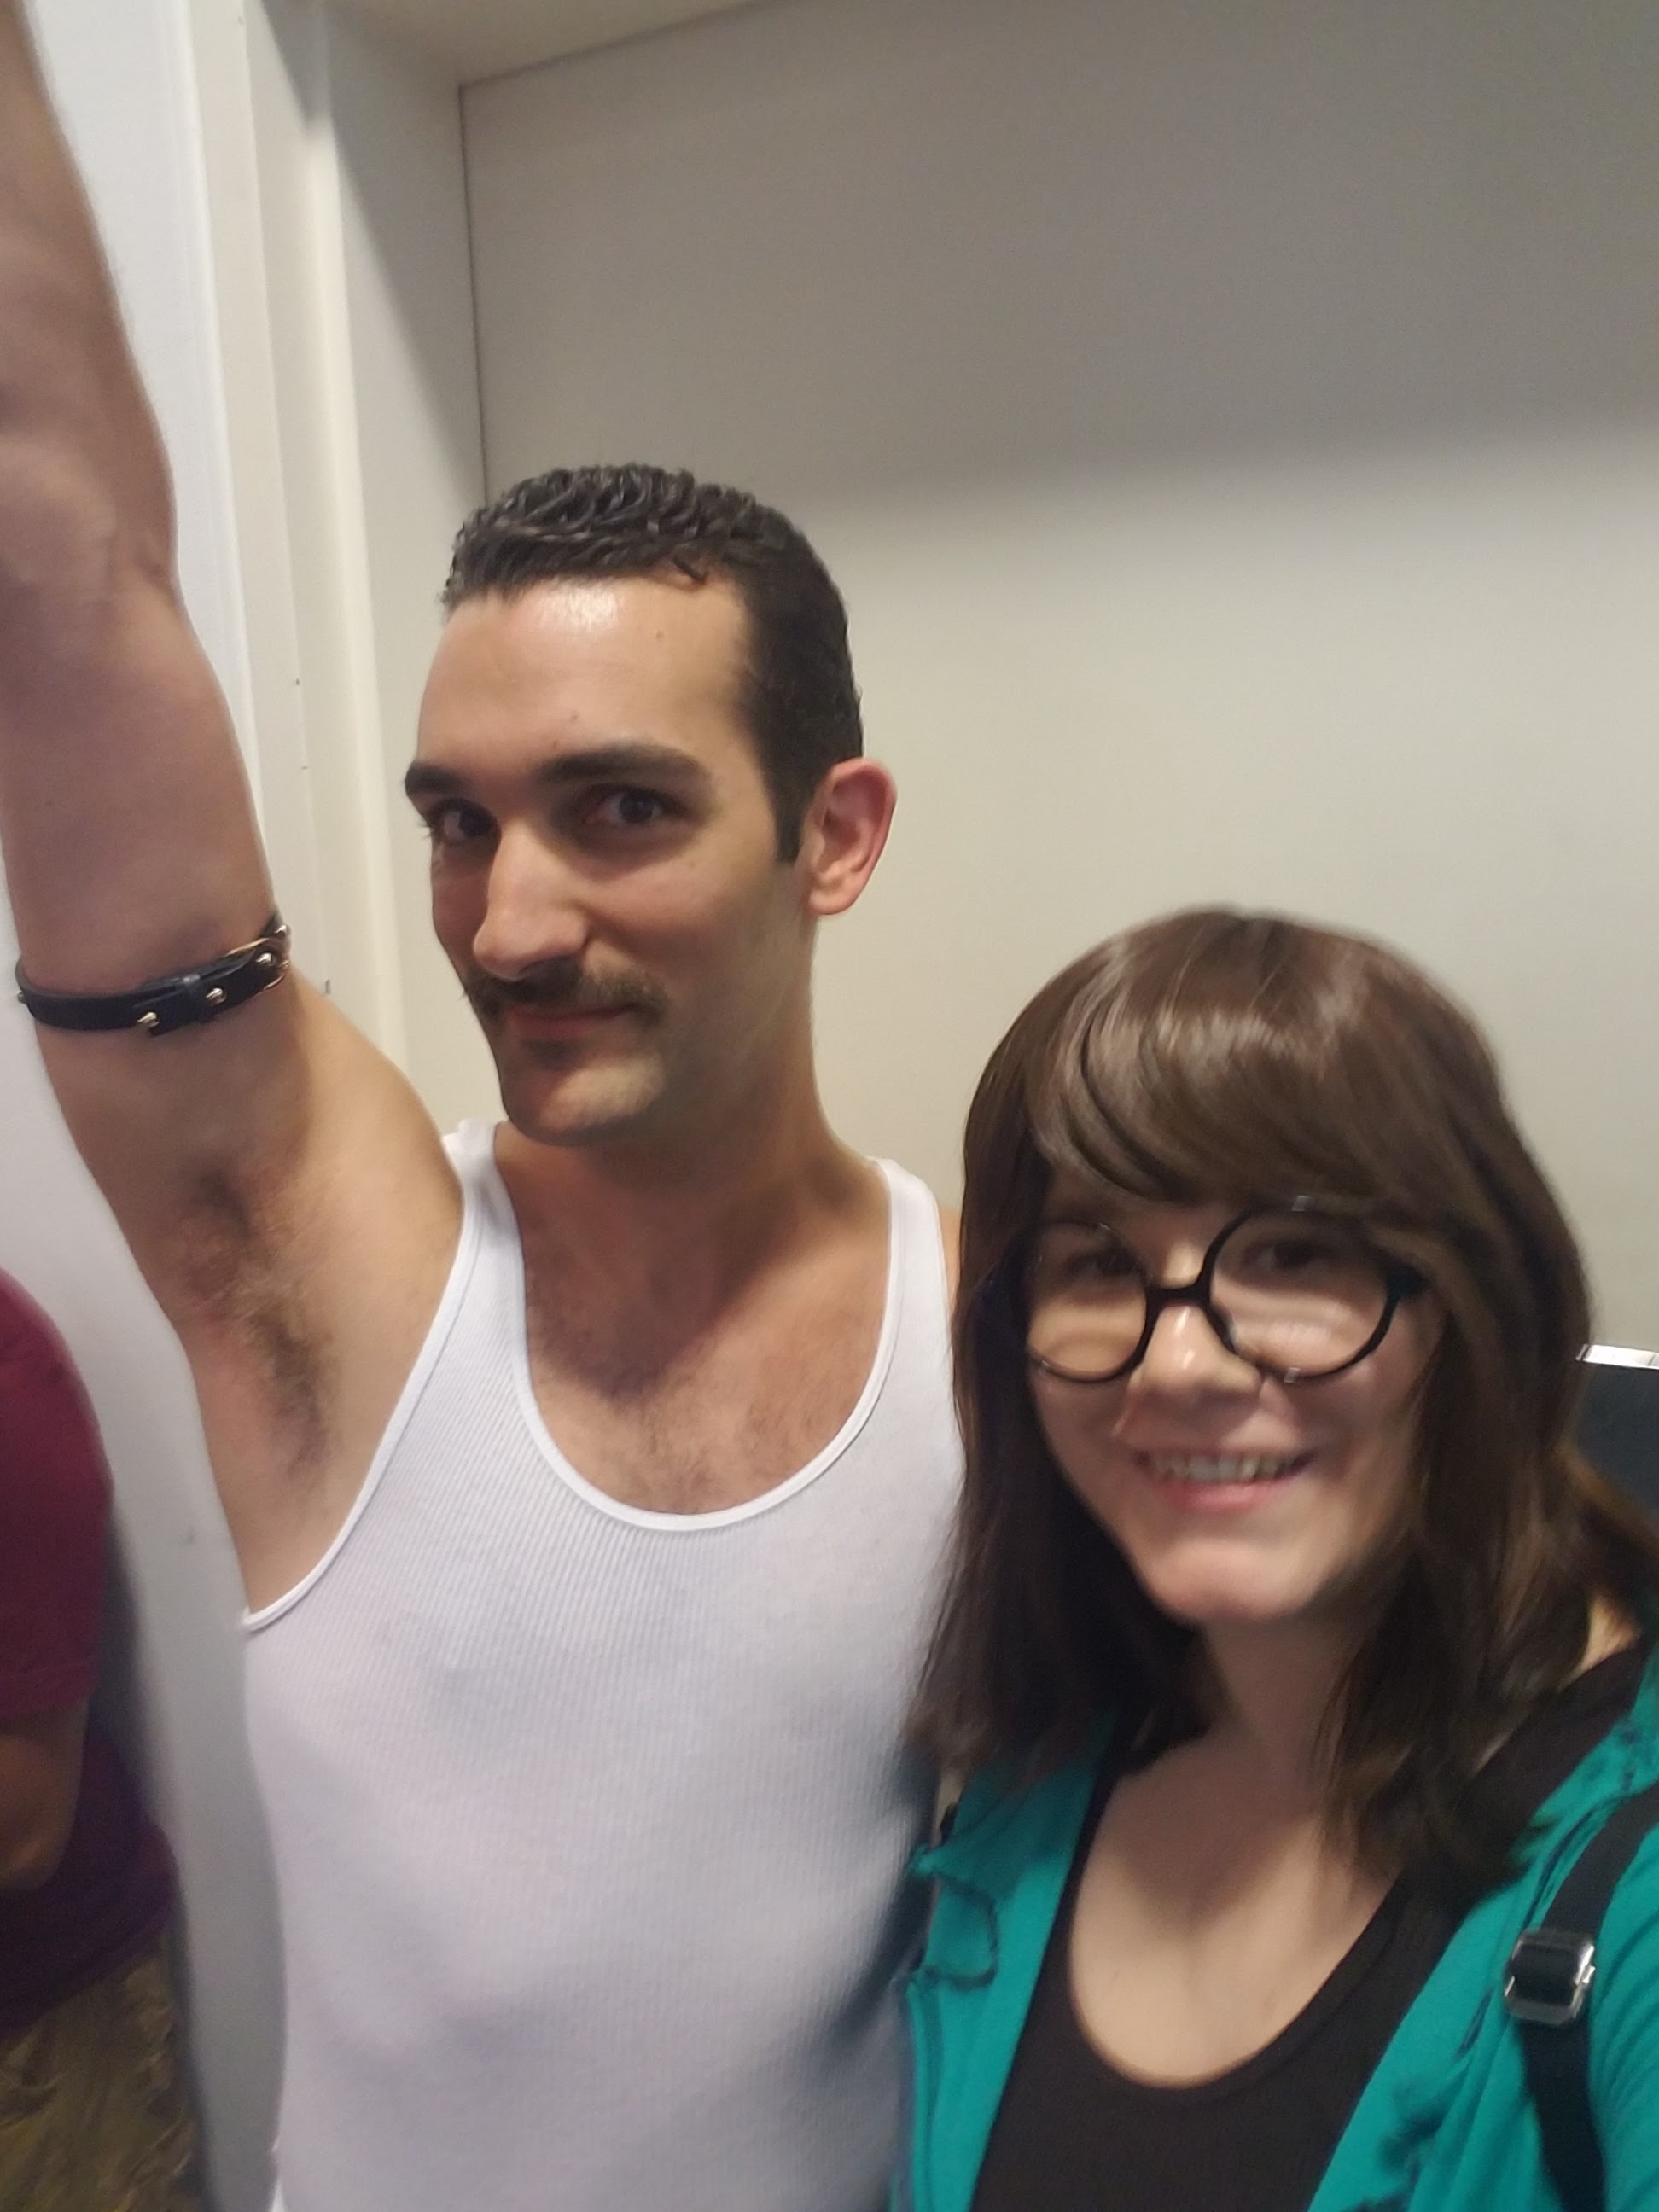
For many years I have attended DragonCon, a very multi-interest convention of geek, sci-fi, tech, fantasy and horror that is very famous for its seasoned cosplayers. From amateur cosplayers (like me) to professionals (like these guys), cosplay is both encouraged and enjoyed by all who attend. 2018 was the first year that I gave it some serious consideration. In 2016, I went as Daria, shown below, with store bought items with some minor alterations. 2017, I sat out on cosplay and spectated.

However, 2018, I decided I was going to throw myself into it. I felt my creative bug come alive. It was July, and DragonCon is Labor Day weekend, so I didn’t have as long as I would like. I work a full time job, I am a full time parent, so my time is very limited. Plus, I really didn’t know what the hell I was doing. I knew I wanted to do something from Doctor Who, which has historically been my favorite sci-fi show, but I didn’t know which character. It had been announced that the new Doctor was going to be a female and at the time there was a release of what the new doctor’s costume was going to be. I loved it, I felt it, but I also knew it was going to be a very common theme, not to mention, I felt like I wanted something a little more challenging. It seemed that doing The Doctor would similar in effort as it would have been doing my Daria Costume. That’s when I vaguely remembered having seen some cosplay Dalek dresses on the internet. A vision quickly formulated in my head, and suddenly I was very inspired! I can still hear my inner squee!
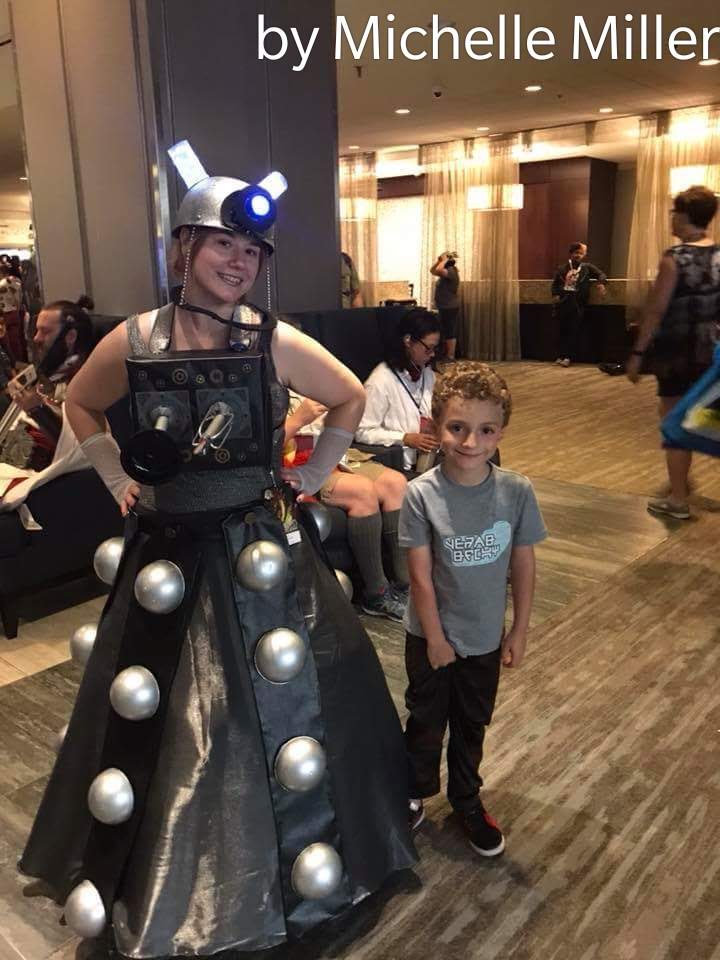
A little background: A dalek is a well known arch enemy of The Doctor. The dalek race was fashioned after the Nazis, and expressed themselves as supreme beings. They want to rule the universe exterminating those who are not dalek and will stop at nothing. The dalek creatures live inside a metal shell that provides them armor like a tank, and have two weapons, sometimes more. The weapons changed over the years and from dalek to dalek.
An Acknowledged Challenge
Going in, I knew I was in for a lot of hurdles to jump over. I’ve never really done this before. My google skills would be my aid, and I would have to accept that I was going to screw up, my costume would not be perfect, and a lot of learning curves were coming. I’ve never used a sewing machine, nor worked with foam; these are some of the essential tools that cosplayers use to construct. Everyone has to start somewhere, right?
The Goal
I envisioned having a thrift bought dress that would act as a backdrop or canvas for my creations. I didn’t like the idea of carrying around the dalek weapons. I decided that they should be wearable. I wanted to be a silver and black dalek, and not the more common gold and bronze ones. I decided I would incorporate led lighting. Who doesn’t like a little sparkle? I considered sound effects using my cell phone and a bluetooth speaker, or a voice changer, but didn’t make it that far.
The Construction
The Dress

One afternoon, my husband and I went thrift shopping for my backdrop dress. After browsing through all the dresses on the racks for nearly an hour, I finally found the dress that was going to be the base of it all. It was perfect. It looked like what metal would be if it could be a flowing silky dress.
The Weapon Box


The weapons box was one of my favorite parts to construct. The two dalek weapons that I decided to construct are the most familiar ones in the Doctor Who fandom, the gun and the manipulator arm. I first took a small cardboard box, cut off the flaps, and covered it with the faux leather. I used my cricut and cut out foam pieces, painted the foam shapes and hot glued them on. To make them appear bolted on I made faux bolts with hot glue and paint them black.
For the Manipulator arm, I simply bought a novelty plunger and panted it black and silver. For the gun, I cut and shaped thick silver coat hangers that I hot glued onto silver painted pvc piping and glued in a red led finger finger toy. I cut holes in the box and pushed in the weapons and took some small foam balls and pushed them onto the ends of the pvc piping and the plunger handle to anchor them into place. The foam balls were filled with hot glue to help seal them on. On the face side of the box, I cut the small foam balls in half and cut out the center so that the piping and handle would slide through it. I covered the foam in cloth and painted it silver.
For the finishing touch, I used some of the remaining cog wheel buttons for decor and hot glued them on. To wear the weapon box on my body, I took elastic and sewed on suspender clips on each end. I crisscrossed the suspenders over my back and wore the weapon box on my chest.
The Sphere Belt


One of the more intricate, and essential parts of the dalek is the half spheres that line the bottom half of the dalek. When browsing the wares at Michael’s, I discovered these half foam spheres used for floral arrangements. They were quite expensive when buying the smooth surface ones, but I was convinced at the time that this would be the right approach.
After acquiring the foam spheres, I decided to paint them. I learned a very important lesson in painting foam. DO NOT USE SPRAY PAINT. I had never painted foam before. I had no idea what would happen. Apparently, the propellant in the spray paint dissolves foam. So, shortly after spraying my first few spheres I walked away to let them dry. When I returned to check on them, they had turned into soup. Lesson Learned #1. I learned that the only way to guarantee a safe quick way to spray paint foam is to airbrush with an air compressor. At this point I had already spent way more than I could on this project and decided I would hand paint with acrylic. This took quite a bit of time, so I did it during my down time from my every day responsibilities. Mostly on the weekends.
When I began considering how to attach the spheres to the dress, I realized that sitting down was going to be a problem. I didn’t want to break them. I thought the easiest way to circumvent that would be to hang them from a belt, which would allow me to move them out of the way when I sat. I decided I would make a faux leather belt and then attach the spheres on a panel that would hang from the belt. This would be a very challenging process as I have never used a sewing machine before. It was a very intimidating process. Pleather is very thick and the teeth do not move the material well. My first attempt didn’t go well. I bent the needle. I went to Joanne’s and talked to one of the associates in the fabric cutting area. She advised I use a large needle and heavy duty thread, and so I did. Round two went much better, but far from perfect. Frustrated, I decided I was happy that the belt wasn’t falling apart even though the stitching was quite embarrassing.
I hand sewed the buttons onto the belt. I tried on the belt. Ok, correction, I attempted to try on the belt, but it was too small. I measured the material incorrectly. Bummer. So I realized I had some elastic that I used for the weapon’s box and simply added it to my belt so that it would easily slip on over my body.
I cut panels of faux leather to attach the foam spheres on them now that they were finished. I didn’t sew the panels, I was fed up with the sewing machine at this point. I lazily left the edges rough and cut button holes on the top of the panels, which I had made the tops into a trapezoidal shape using hot glue. Then I moved onto attaching the half spheres. My original plan was to simply hot glue the half spheres onto the panels. At first it seemed to work. I attached the panels onto the belt and soon the spheres started to peel slightly off and dangle from the panels. I knew I needed a better solution. After a lot of searching, I discovered these twist upholstery pins that corkscrewed through the panels into the foam and secured them nice and tight.
The Helmet & Eye

The helmet started off as a bike helmet. I wasn’t happy with the way it stood out from the rest of the attire. It seemed a bit too out of place. I wanted something to be more military-esque. I went to the army surplus store and looked for a combat helmet. I was excited when I found one. Not only was it expensive, it was insanely heavy and hot! No way would I be able to get through DragonCon wearing that! So, I thought maybe Party City would have a fake one. And they did! It had a cloth exterior camouflage that I removed and painted over. Painting this surface was kind of tricky. It was very smooth and non-porous, therefore, the paint wanted to run. I tried slow quick strides of spray paint. Sometimes it helped, sometimes it didn’t, other times I simply got carried away.
Finding the two cup like parts that sit on top of the helmet was fairly challenging. The best I could come up with was a couple of empty confetti shooters. I knew that I wanted the cups to light up. I used a used masonry drill bit to drill into the plastic helmet which prevented cracking the plastic. This provided a place to feed led lights from inside the helmet. I hot glued the cups on and taped the power source for the lights inside the helmet.
For the eye, I went with a kids caving headlamp. I bought some blue transparent packing wrap from Michael’s and inserted it under the cap of the headlamp. I cut the headlamp off of the banding and hot glued it onto the helmet.


What Would I Do Differently?
Since I have completed this project, about 5 months ago, I have learned how to properly thread my sewing machine to prevent those really lousy stitches and I have learned how to use it, for the most part. In retrospect, I definitely would have sewn my bits better. For the belt, it should have been measured a bit more accurately. And I may have included some Velcro on the panels to prevent the panels from sliding around so easily.
For the half spheres, I maybe should have shaped some foam myself using a heat gun, it would have been way cheaper, but maybe not so durable. I think I should have made the plunger. The one I used was very heavy.
The Feedback
After I got a majority of the work done, I had a sense of pride. Maybe too much pride. I forgot to see the humor in what I made. I was very serious about making it and the result. I was a fearsome dalek! I wasn’t a clown!
I posted my photo on a Doctor Who group on Facebook. It didn’t take long to get attention. So many people were laughing. I got one person who told me “A for effort” implying I didn’t quite do it. I felt a bit misunderstood. Some heckled at the placement of my weapons being where my boobs are. I wasn’t trying to sexualize them. Its just where weapons would be if they were on a human.
I took the image down. I couldn’t handle some of the criticism about something I worked so hard on. I felt a bit stupid.
I worked so hard on this and spent a ton of money in the process. I turned to one of my favorite facebook groups, Dragon Con Cosplayers and asked them if they felt I should bring it or leave it home. I explained what had happened in the other group. The love and feedback was immensely wonderful. I was reminded that people laughing at it is ok, it isn’t always meant as an insult, they just find humor in it, and yes, I probably would too if someone else had been wearing it. People acknowledged the amount of work and effort it took, and they thought it was fabulous. I was overwhelmed with a sense of support. There was no way i would leave it at home now.
At DragonCon I was in at least a hundred photos. Many people recognized me from the Cosplay group and high-fived me and gave me (depending on your generation) props or kudos. It was a blast to wear at the annual Doctor Who Ball. In the end, I felt it all paid off. One of the best convention experiences I have ever had. I accomplished my goals, it was a blast!
Thoughts? Comments? Ch/jeers?
Comment below with your suggestions, what you may have done differently, what you learned, and any questions you may have! Share your cosplay experience! Don’t forget to follow me on Facebook!
No responses yet